Simple Farmhouse Style Window Trim
Learn how to add simple farmhouse style window trim to any window without any complicated cuts. This is the simple and easy way to achieve a custom look in the home.
We have been living in our double wide manufactured mobile home for almost 6 years. One of the many updates that we have looked forward to adding in our home is window trim.

Several years ago, we did a complete remodel on the exterior of our manufactured mobile home. This included new windows. If you have been following our story, you may know that we had to put our remodeling process on hold for a few years. We purchased some land and made the decision to have our home moved.
Now that our home has successfully been moved, we have started back up with the remodeling process. Adding simple farmhouse style window trim has transformed the look of our living room and I am excited to share the details with you.
Simple Farmhouse Style Window Trim Video

DIY Simple Farmhouse Style Mobile Home Window Trim
The above photo shows what our home looked like when our family took ownership in 2013. The faux brick paint job, holes in the sheet rock and old windows lacked character and style.
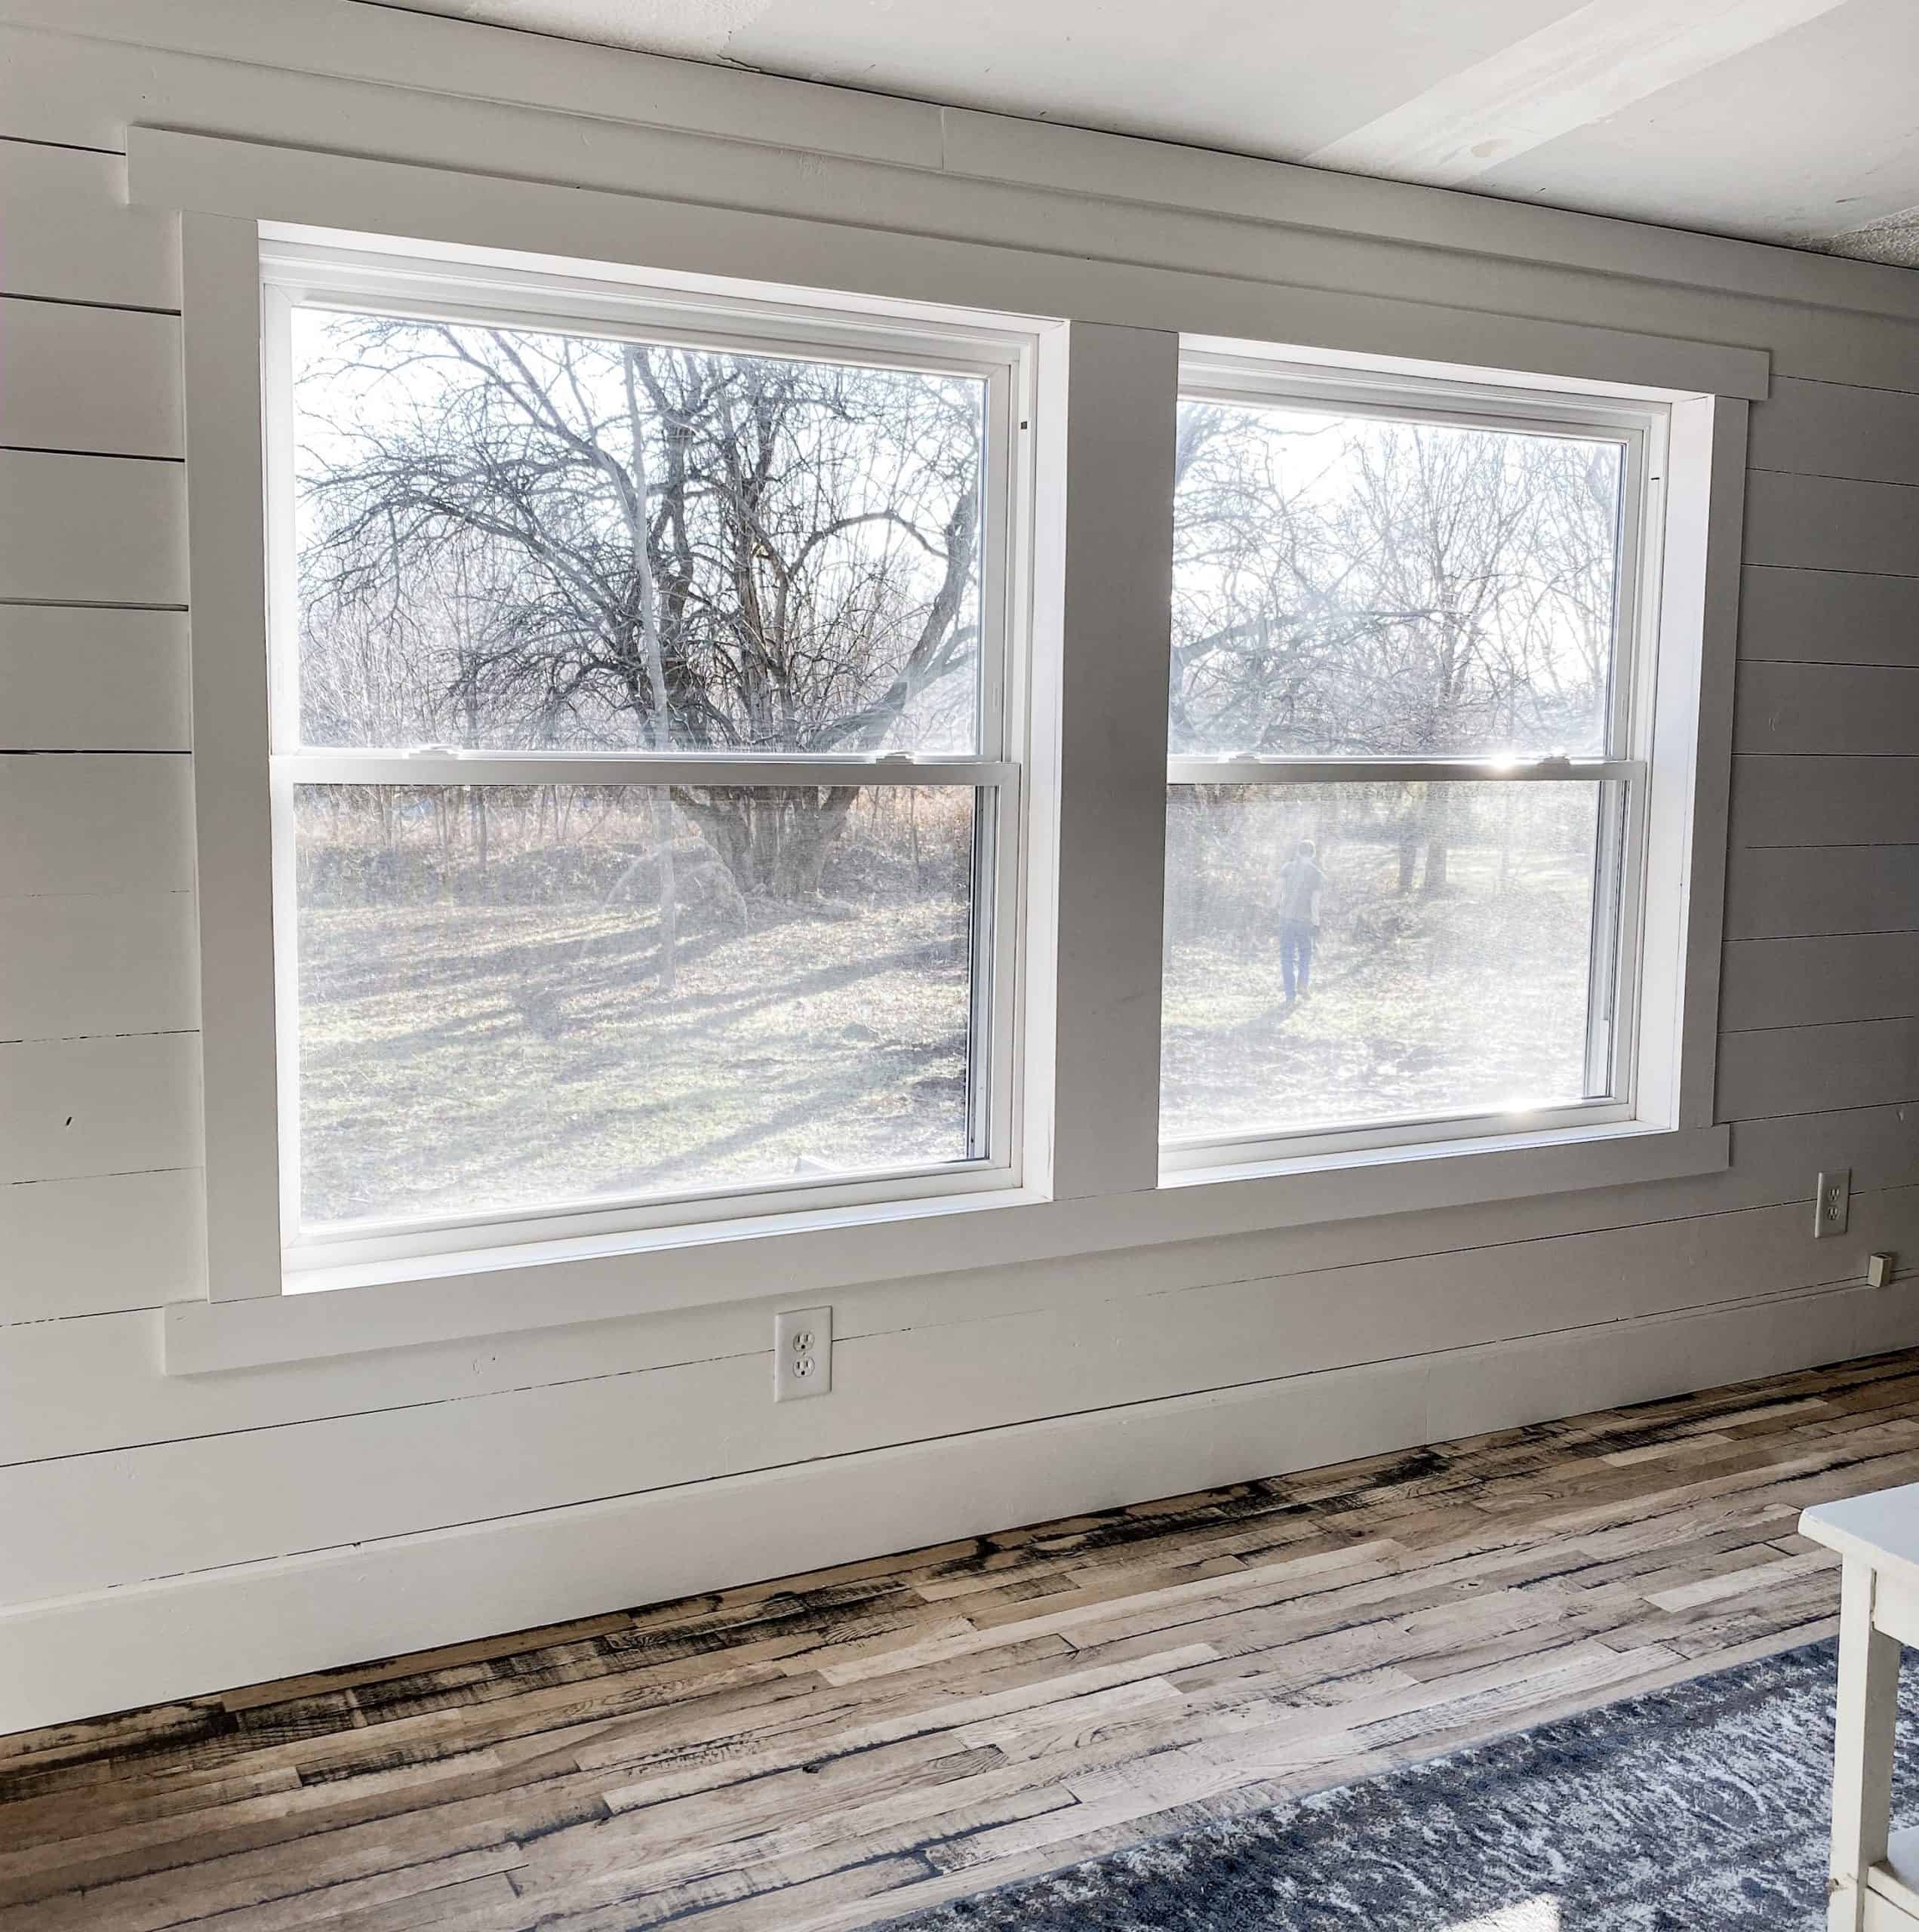
Over the last several years, we have installed new windows and shiplapped the walls. Making those two changes, changed the look of our home but I knew that what this space really needed was simple farmhouse style window trim.
There is a wide variety of ways to add trim around a window and there are also many different styles of trim. This is my simple and easy take on adding trim.
Step 1: Remove Old Window Trim
Our manufactured mobile home had thin pieces of trim that I removed from the window. After removing the trim, I pulled out any of the remains nails. On some areas of the window, there was a type of glue residue that I also had to scrape off and remove.

Step 2: Supplies Needed for Adding Trim to a Window
This post may contain affiliate links. Please see my full disclosure here.
1×4 (how many you need will depend on the size of your windows)
1×10 (this was the board I used between the two windows for trim)
Nail Gun
Air Compressor
Brad Nails
Trim Caulk
Paint
Table Saw
Miter Saw
Step 3: Measure and Cut Boards for Window Sill Trim
The first place that I started was the inside of the window sill area. Before I could add trim around window, I had to add trim to the cover the exposed wood and shiplap.
To do this, I measured the length at the bottom, the sides and the top. Then, I cut the boards to the correct length. Next, I measured the width and then ripped the boards to the correct width on a table saw.
To attach the boards, I used a nail gun and nailed the boards into place.


Step 4: Measure and Cut Boards for Window Trim
The next step was to measure the sides of the windows for my 1×4 trim. I then cut the two side boards to the length I needed, sanded them down and attached the board with the nail gun.
Then, I measured the length of the top window and bottom window. I added 3 inches to the measurement because my top and bottom trim board has an overhang of 1 1/2 inch on each side. Next, sand the boards down and attach them to the wall with the nail gun.
For the center section between my windows, I used a 1×10. I had to measure the length and width to get the correct dimensions for the board. I attached it the same way I did all the boards.

More Double Wide Mobile Home Remodeling Posts
- Mobile Home Farmhouse Exterior Remodel
- Removing the Marriage Wall in our Mobile Home
- Moving Our Double Wide Mobile Home
- How to Hang Shiplap on Mobile Home Walls


Step 5: Fill all the Gaps and Nail Holes
Caulk and nail hole filler will be your friend when it comes to covering any of the gaps and the nail holes.
Now, I have to be honest and tell you I didn’t fill in all the small gaps between my boards. I am not all about perfection and since I have that rustic look in my home, I just left it alone. However, I did fill all the nail holes in.
To fill in the nail holes, I put a little of the nail filler putty in my finger, rubbed it over the hole and then let it dry. Once dry, I used a wet rag to remove any of the excess putty. This is so much better than using sandpaper. No dust and it smooths right out. I am telling you, no fancy stuff here!


Step 6: Dust and Clean
Before I ever start painting, I clean up the mess and then dust the windows. I also wipe down the boards to remove any dust that may be left behind. I want to be sure that I have a clean surface to paint.
Step 7: Paint Window Trim
The last step is to paint the window trim. I chose to paint my trim the same color as my walls. I love using Snowbound by Sherwin Williams. After two coats of paint, this space looked much brighter! It’s quite amazing what some wood and paint can do, right?


Step 8: Decorate
After the paint dried, I started adding back in our furniture. I normally have a couch in front of the window, but that tends to block a lot of my light. So, I chose to keep it very simple with my vintage chairs and end table.


Tips for Adding Simple Farmhouse Style Window Trim
Measure, then measure again before cutting a board. I don’t know how many times I have accidentally cut a board the wrong size.
Always choose the best boards for your trim. Boards should be straight. This will make attaching them to the wall much easier.
Sand the boards before attaching them to the wall. This prevents having to sand the boards inside the house and the boards are ready to paint once they are attached to the wall.

Before and After Simple Farmhouse Style Window Trim
After looking at the before and after of the simple farmhouse style window trim, you may be wondering where the fireplace went. Well, it is still in that corner. We chose to move the wall that the fireplace is on back three feet to enlarge the living room. When we moved the wall back, we redid our fireplace area.
Adding shiplap to the walls, and now trim around the windows as well as a baseboard has completely transformed this wall. It’s now a bright cozy area to enjoy morning devotions and coffee. The children enjoy this space just as much as I do.

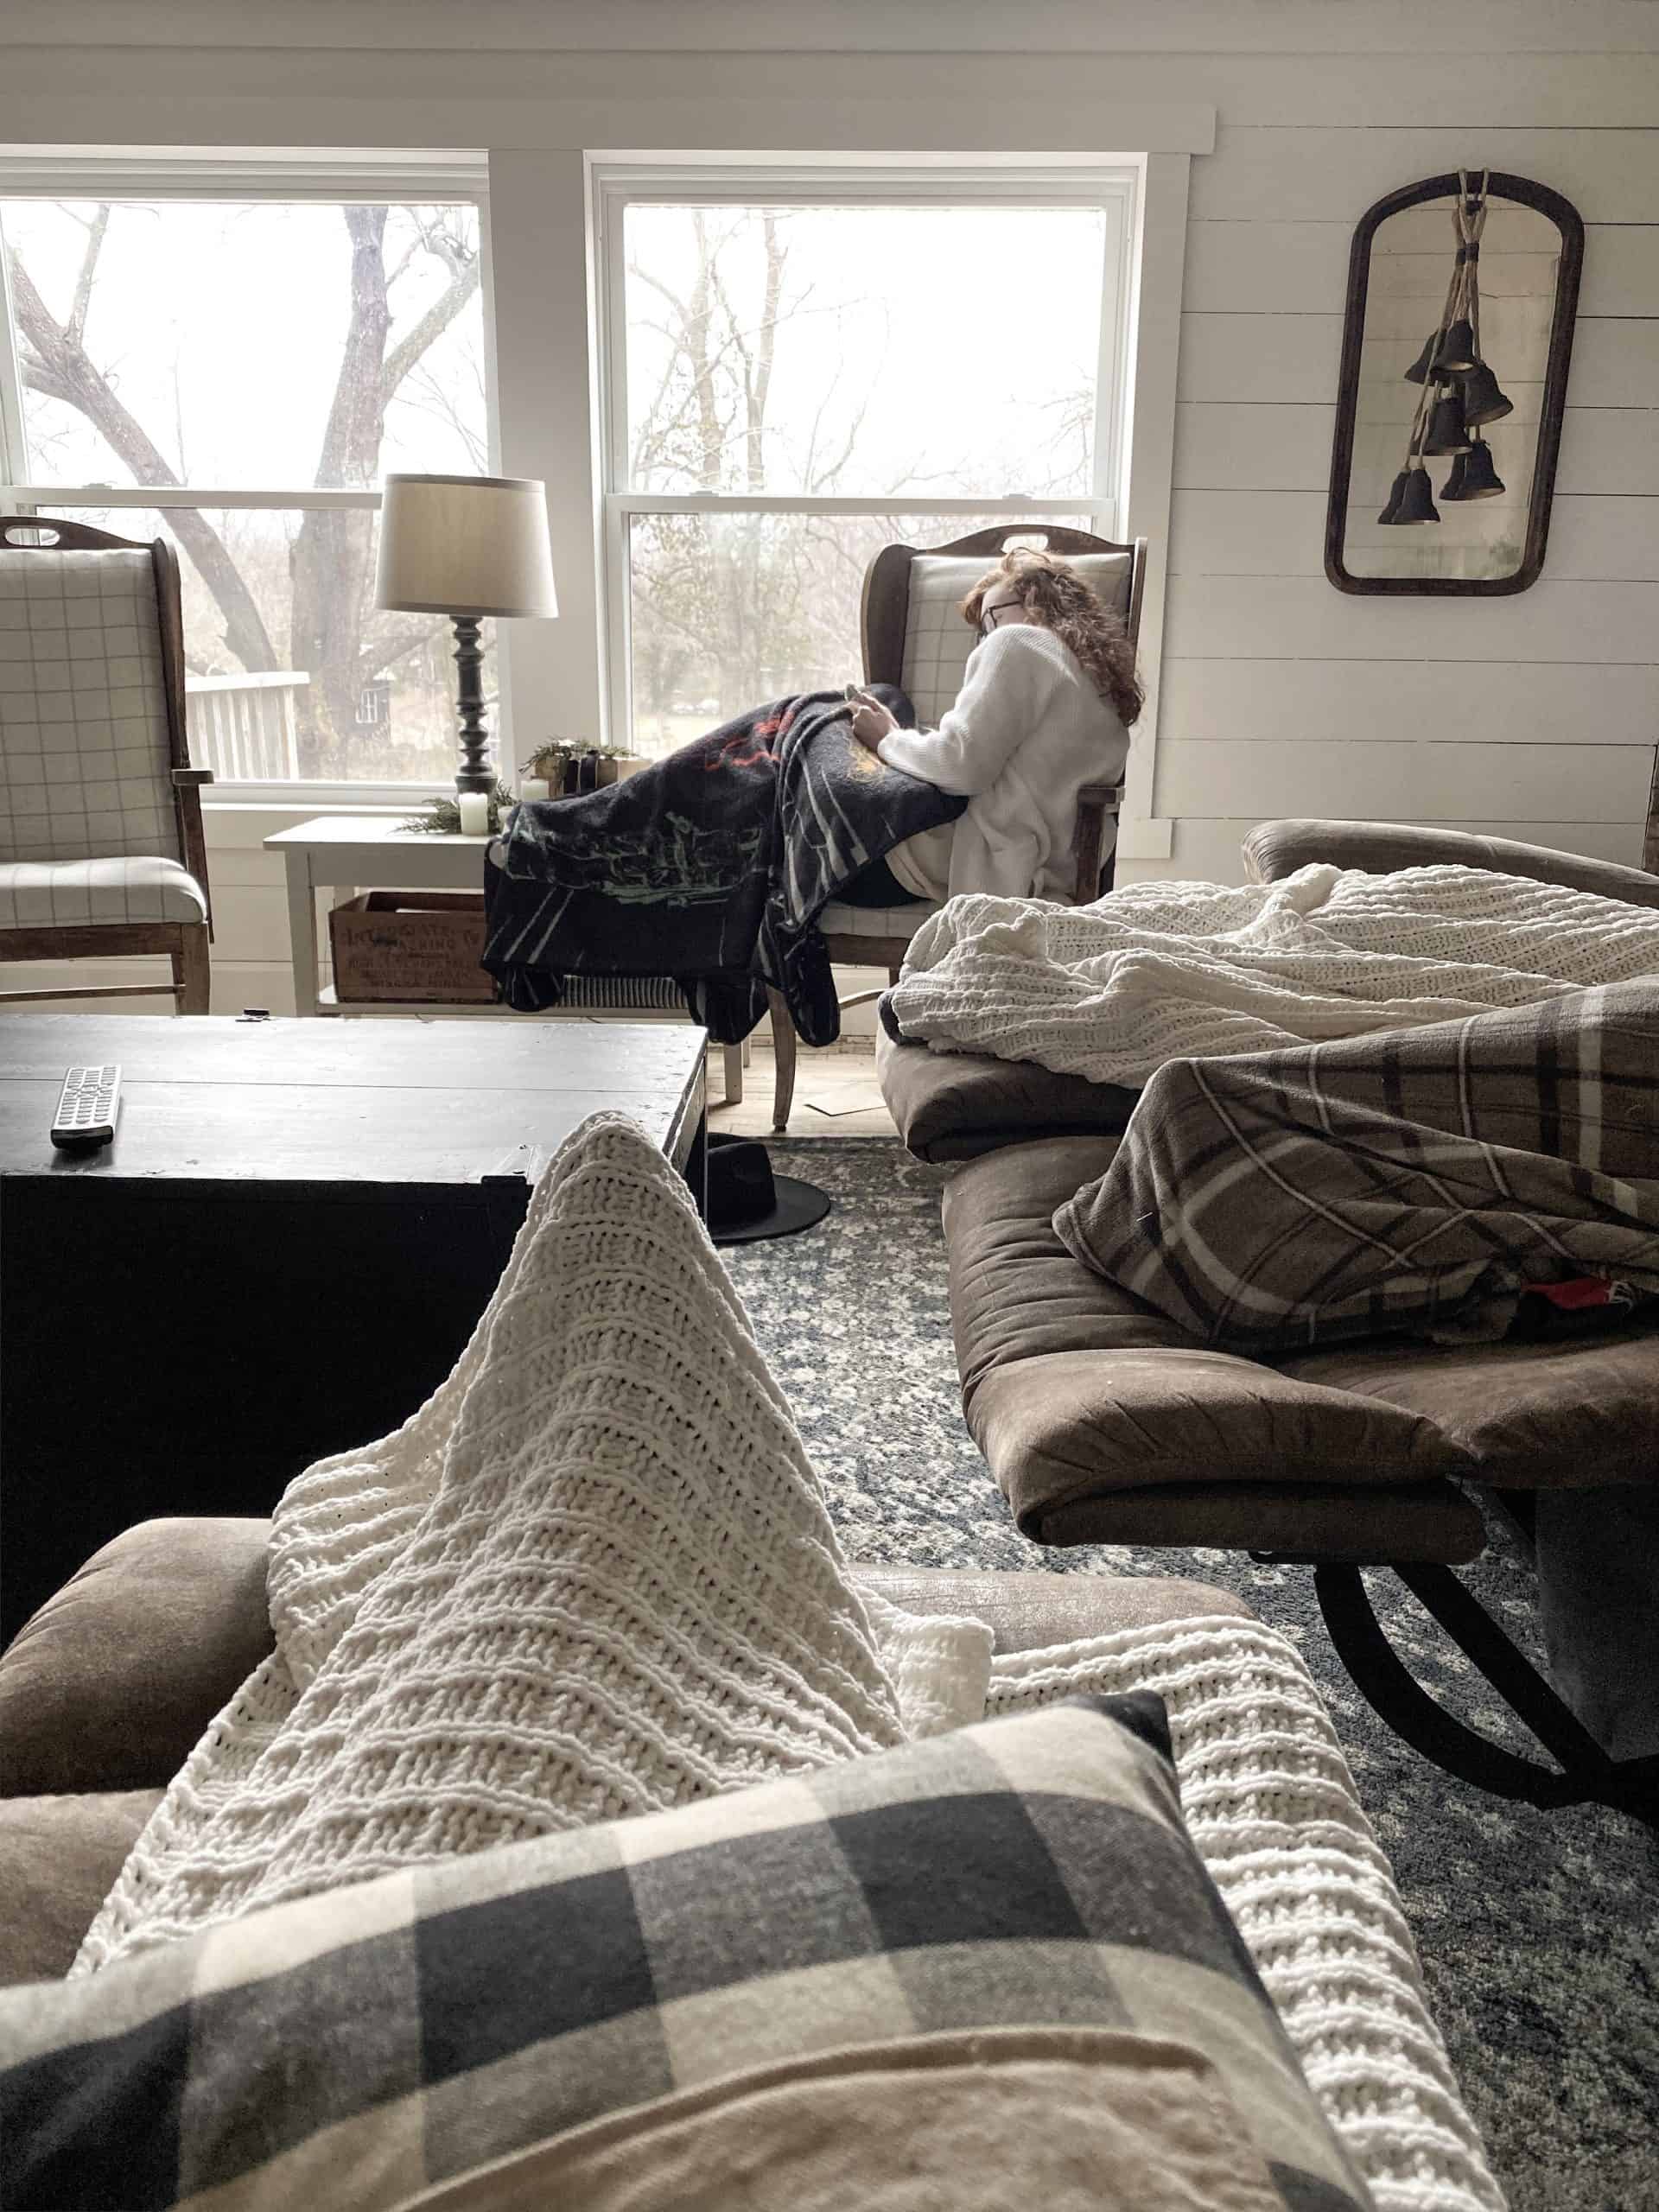
Like I mentioned earlier, I keep it simple. There isn’t anything fancy around here. Just basic, simple touches that make our home feel cozy and look nice.
So, what do you think? Think that this is a project you could do? I honestly think you can! I remember being afraid of power tools and saws but I quickly learned that I love being able to do things myself.
Farmhouse Style Related Posts
Vintage Style Wing Back Chair Makeover
DIY Vintage Style Pillow Cover
Shop This Post
White Chenille Throw Blanket found HERE
Pin For Later


What a wonderful and WELL detailed explanation of how you did all the finishing work around your windows! A fantastic blog post! I love the finished look around the windows! I also like the way you used just a few simple pieces of furniture, that allows lots of daylight to come through the windows…it just adds more ‘open feeling’ to your living room.
I have to ask… the stitched (crocheted?) cream colored blanket, covering your feet…did you make that? It’s really pretty! If not, can you please share which store carries it? Thank you!
Again, great blog post!
Thank you so much!! I am always encouraged when others find a post helpful. The blanket is from Target.
Well done! Your style is exactly what I like. Also, the light through that window is wonderful.
Very nice, job well done!!!! May I ask where you found your area rug?
You can find the rug here. (Aff link)
https://amzn.to/2mgzoQs
Have wanted to do this in my double wide windows and you have inspired me to take it on!! Thanks for the very clear explanation of the project…and that view is Gor—geous!!! What a welcoming room!
Thank you! I am so thankful that you are inspired to do this in your own home.
Is your shiplap 6” or 8”?!
Ours is 8″
Absolutely fabulous. We have six windows that have to be framed. I wish I felt confident enough to give cutting with the saw, a try. Although, not only do I love your simple step by step tutorial, I am still afraid of that saw. You nailed this diy project. Thanks for sharing
Thank you so much!
Such a fantastic job you did with your window trim, Sarah as well as the rest of the room. So incredibly cozy. I LOVE it.!